
At the end of the last chapter, we created an internal style sheet by copying a series of inline attributes and then pasting them into the head of our document. In this chapter, we will review how to create an external style sheet. We will then place our style sheet into our website css folder and then provide a link the style sheet in the head of our web documents.
Bluefish CSS Style Sheet Builder
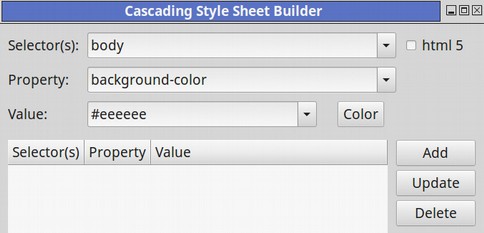
In addition to providing tools to build HTML documents, Bluefish comes with a tool to create style sheets. They call it the CSS Style Sheet Builder. To create a stylesheet using the CSS Style Sheet Builder, click File, New to open a new document. Then in the Bluefish Toolbar, click the CSS tab. Then click on the Create Style Sheet Icon which is the first icon on the left. This will open the Cascading Style Sheet Builder:
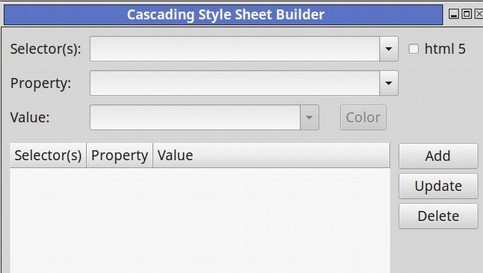
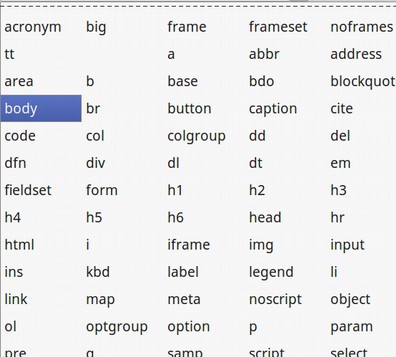
Click on the Selector Drop down arrow. This will bring up a list of elements or tags which in CSS are called Selectors – all listed in alphabetical order. In addition to the selectors on this list, we can create our own custom selectors – which we will discuss later in this chapter.
For now, click on the body selector which is the first selector in most HTML documents.
Then click on the Property drop down arrow to see a list of properties we can apply to this selector.
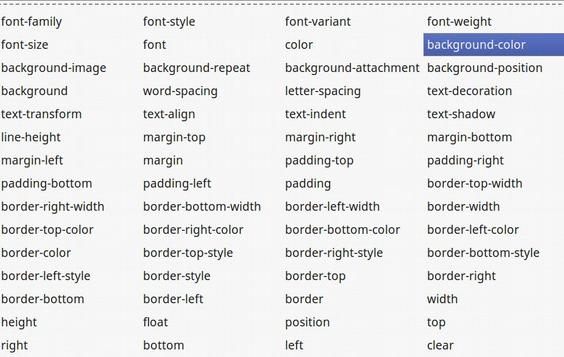
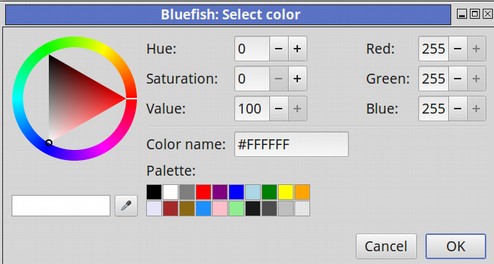
The above is just part of the list of properties we have to choose from. For now, click on background-color. Then click on the drop down arrow to the right of Value. This will show a list of common colors we can click on. You can also click on the Color button to bring up this color picker.
We can also just type in our own value. In this case, we will type in #eeeeee which is very light gray. This will make our web pages easier to read.
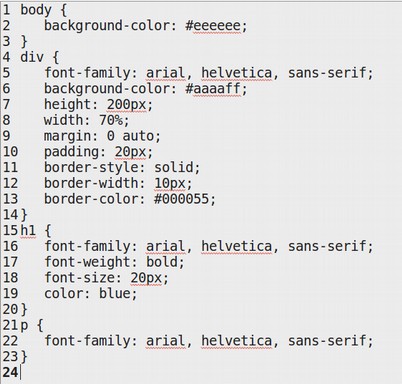
Then click Add. Next, choose the h1 selector. For property, choose font-family. For Value, choose Arial. Then click Add. Then choose the property font-weight with value bold. Then choose font-size with value 20px. Then choose Color with value Blue.
Then choose the P selector with property Font-family and choose Arial.
Then choose the DIV selector and with property Font-family and choose Arial. Finally, add the following Properties and Values to the DIV Selector. These are the values we added to our Internal Style Sheet in our last chapter.
Property: Value;
background-color: #aaaaff;
height: 200px;
width: 70%;
margin: 0 auto;
padding: 20px;
border-style: solid;
border-width: 10px;
border-color: #000055;
When you are done, click OK. Here is what the CSS will look like.
Then save the file with the dot css extension at the end of the file name. Remember that the file name should be lower case with no spaces. We will save the file in our website css folder as myfirststylesheet.css.
Link the Style Sheet in the Head of our Web Documents
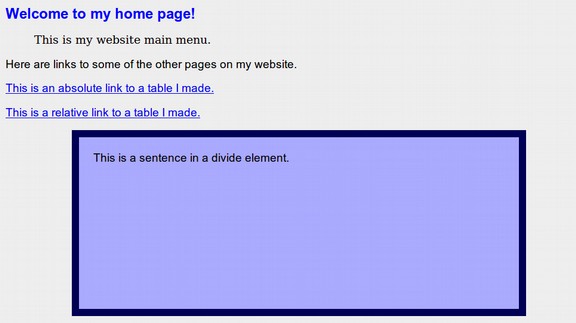
Open your index.html file. Above the first image, create a new line and type in: This is a sentence in a divide element. Then put the sentence in a div tag. Create a new line after the last line of meta data. Then copy and paste in the following link:
<link href="file:///home/david/My First Website/css/myfirststylesheet.css" rel="stylesheet" type="text/css" />
On a real web page, use the full URL. Note that the <link> tag should only used in the <head>section of your web documents. But you can have more than one stylesheet and each should have its own link tag. Also note that the link tag has a closing bracket but not a closing tag. If the link is valid, you will see this page in your browser.
Copy and paste the style sheet into the head section of all of the web pages you want to apply the style sheet to. Keep in mind that you will need to have content in a div tag on a page in order for the CSS to be applied to it.
Modify an External Style Sheet
The Divide Container above is too high and the Heading 1 is too small. Go back to Bluefish and open the CSS file. Make the h1 font size 28 and the div height 100px. Then click File Save for the CSS sheet. Then preview the HTML page in the browser again.
Create a CSS Class to Style a Special Paragraph Tag
Imagine you have a web page with a bunch of Paragraph tags and you want some of those paragraphs to be a different color. This would be the CSS you should add to your CSS file:
p.blue {color: #0000FF;}
p.green {color: #00FF00;}
p.red {color: #FF0000;}
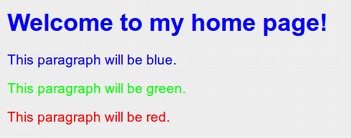
Then copy and paste these three sentences into the HTML below the H1 row.
This paragraph will be blue.
This paragraph will be green.
This paragraph will be red.
Put paragraph tags around each sentence.
Then with the first sentence, carefully place your cursor inside of the opening tag just before the closing bracket. Type a space, then type these two lettters: cl. The following screen will appear.
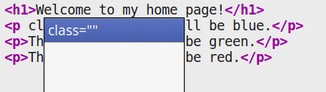
Press Enter on your keyboard to insert the class attribute. Then inside the paratheses, type blue. Repeat these steps to create the green and red classes. Here is the HTML.

Save both the CSS sheet and the HTML file. Then open the HTML file with your browser:
Create an ID Selector to Style a Very Special Element
CSS classes are used to style a group of elements. For example, anytime you want to color a paragraph blue, you can use the p.blue class we created above. You can use this class as many times as you want. The p.blue class is a special case of the normal p element. The styling of a class therefore always over-rides the styling of its parent element. But there is an even more specific selector that the class. This most specific selector is called an Identity or ID. The ID selector is intended to be applied to a very specific element and is intended to be applied only once.
Understanding Inheritance
Because the ID selector is more specific than the Class, the ID selector styling has priority over the class styling. If there is a difference between the styling of the ID and the class, the styling of the ID will be used. However, if there is a style property not called out by the ID, then the styling of the Class will be used. If a style property is not called out by the class, then the style of the parent element will be used. In other words, classes and IDs will inherit properties from parent elements. If the style of the parent element is not defined, and is not defined by either the class or the ID, then the default style of the browser will be used. All elements have hidden default settings that do not need to be defined.
In short, an ID selector is a name preceded by a hash character (#) while a class selector is preceded by a period. An ID selector is used to style an individual element while a class selector is used to style a group of elements. These elements are typically heading elements, paragraph tags and divide tags. But they can be almost any element.
Naming IDs
Each ID name must be unique and used only once. While the ID name can be any text, ideally the ID name should describe the element and the modification being made to the element. For example, an unordered list element <ul> that's used to style a navigation menu might be named id="navigation" or id="menu"
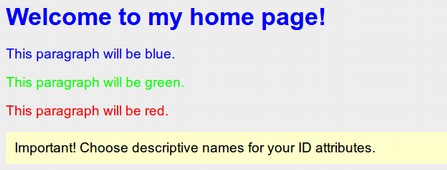
Imagine you have an important paragraph that gives a special notice on a page. You want this important paragraph to stand out so people are sure to notice it. You could add id="notice" to that paragraph, like this:
<p id="notice">Important! Choose descriptive names for your ID attributes.</p>
To add style to an element with an id, you preface the id with a # symbol in your CSS. For example, here's how we could make our alert paragraph appear in a big yellow box with a black border and big black text:
  p#notice {
    background: #FFFFCC; /* yellow */
    padding: 10px;}
Note that specifying the element type in CSS is optional when the element has an id. In the above example, we use "p#alert" as the selector, which tells the browser that the following style applies to the paragraph with id "notice". However, since there's no other element - paragraph or otherwise - that has that same id, we could have used "#notice" as our selector, without the "p", like this:
#notice {
background: #FFFFCC; /* yellow */
padding: 10px;}
It is best to include the element because it helps you to remember which elements had certain id's.
Practice Creating an ID
In Bluefisth, add the following ID selector to the bottom of your CSS sheet.
p#notice {
background: #FFFFCC; /* yellow */
padding: 10px;}
Save the CSS sheet. Then add the following HTML to your index.html file:
<p id="notice">Important! Choose descriptive names for your ID attributes.</p>
Then save the html file and view it with your browser.
This background color trick not only works in paragraph tags on web pages, it also works with paragraph styles on Libre Writer documents – which is how we have been creating our yellow boxes in this section!
Using a Class to Style a Divide
As we saw in the last chapter, divides can be used to style an entire section of a web page by putting that section in its own box. What if we want different divides to look differently? We could assign ID names to each box and then style the ID selectors. But what if there was more than one box that we wanted to have the same styling? This is where we should use class attributes.
Remember that to add style to all elements that are part of a particular class, you preface the class name with a period (.) in your CSS. For example, here's how we could add a light blue background and dark blue border to a divide we will call div.blue
div.blue {
background-color: #EEEEFF; /* light blue */
border: 3px solid #003399; /* dark blue */}
This is how we would add a light green background and a dark green border to a divide we will call div.green.
  div.green {
    background-color: #EEFFEE; /* light green */
    border: 3px solid #009933; /* dark green */}
Copy both selectors to the bottom of our CSS style sheet. Save the sheet.
Then add these two sentences to the HTML file just below the exising divide.
This is a sentence in a blue divide.
This is a sentence in a green divide.
Place divide tags around each sentence. Then carefully place your cursor inside of the first div tag just before the closing bracket. Type type a single space. Then type these two letters: cl. Then once the word class appears, press Enter on your key board to insert the class. Type the word blue between the parathesis. Repeat with the second sentence to create the green divide.
Save the file and view it in a browser:
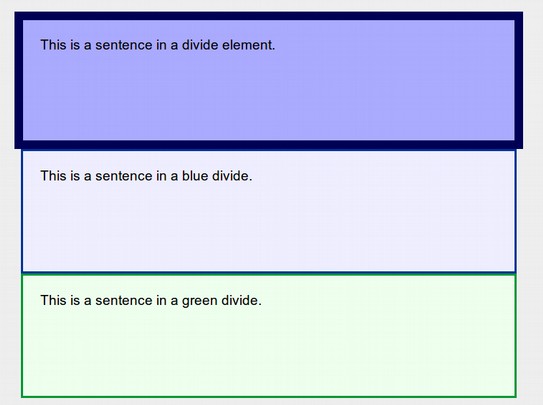
We should have added some margins around the divides to see them better. However, note that the blue class CSS overroad the initial divide CSS. Then the green class CSS overroad the blue class CSS. But both the blue and green divides inherited the 100px height of the box because this property was called out in the initial divide but was not changed in either the blue or green divide.
When in doubt use a Class Instead of an ID
A navigation bar is basically an unordered list with a series of links. If you apply a class to a navbar element to make it look different from another navbar on your web page, the HTML would look like this:
<ul> <li
class="navbar"><a href="#">Home</a></li>
<li
class="navbar"><a href="#">
About
Us</a></li>
<li
class="navbar"><a href="#">Contact
Us</a></li>
</ul>
But if you applied an ID to style your nav bar, then the HTML would look like this:
<ul> <li
id="navbar"><a href="#">Home</a></li>
<li
id="navbar"><a href="#">
About
Us</a></li>
<li
id="navbar"><a href="#">Contact
Us</a></li>
</ul>
Depending on the browser, the nav bar might still appear. But the code violates the rule that an ID should only appear on an HTML page once. So do not take any chances. Use IDs very very rarely.
Descendant Selectors for Elements Inside of Elements
In addition to assigning styles to a class of elements, you can also assign styles to descendants of those elements. A descendant is an element that is nested inside another element. For example, let's say you wanted all <a> elements (links) on a page to be blue and underlined. Here is the CSS:
a {
         color: blue;
			text-decoration: underline;}
However, imagine you wanted a different style for links that are part of your navigation menu. You want them to be black text on a light blue background, with no underline. Assuming these links are contained within a <nav> element, you could stylize those using descendant selectors in CSS, like this:
nav a {
color: black;
background-color: #aaaaff; /* light blue */
text-decoration: none;}
In the above example, the selector nav tells the browser to apply the style definition to every <a>element that's inside of a <nav> element. In other words, if a link is inside the navigation menu, apply this special style to it.
What’s Next?
In the next section, we will review some important questions for formating the appearance of the text on your web page.