
What makes the modern internet so powerful is that viewers can rapidly conduct research by clicking on links to move from one web page to another. In fact, the internet can be thought of as a vast library of hyperlinked documents where links provide the crucial bridges to travel between web pages. Even search engines are nothing more than a series of related links. One common useage of links within a website is to build a navigational menu of links showing the relationship and order between various pages of a website. Even the idea of the World Wide Web was for links to be the Spiders Web that held the Internet together. It is therefore important to take the time to learn how hyperlinks work and then make the effort to add both internal and external links to your web pages.

Once again, we will use the Bluefish Web Editor to help us learn the syntax for anchors and links. Open Bluefish and create a new HTML document with the Quickstart button. For the title, call it How to Add Links to a Web Page. Here is the beginning of our HTML document.
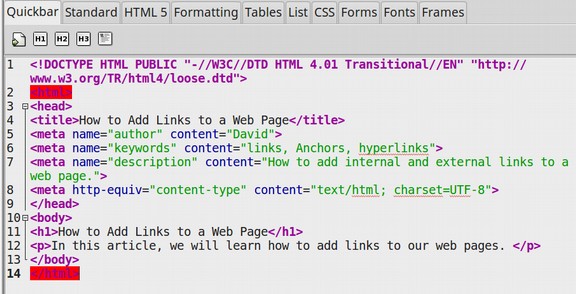
Save the document to your website HTML folder as myfirstlinks.html.
Next, put your cursor right after the closing paragraph tag. Then press Enter on your keyboard to create a new blank line. Type into this line “This is my first link!”
Then select this line and click on the paragraph tag. Finally, select the word link and then click on the Standard Tab, then click on the black Anchor icon to bring up the Quick Anchor Wizard.
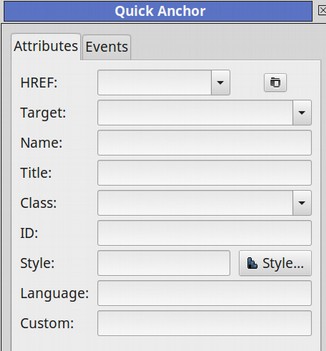
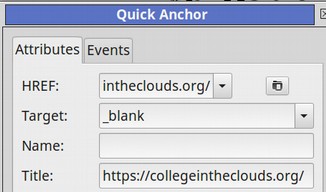
For the HREF, go online and find a webpage you want to link to. Then copy the URL into your clipboard. We will use https://collegeintheclouds.org/
For target, select _Blank. Then click OK. The following HTML Anchor or hyperlink will be added to your HTML document:
<p>This is my first <a href="https://collegeintheclouds.org/" target="_blank">link!</a></p>
Note that the A tag is inside of the P tag. The A stands for Anchor. The HREF stands for Hyperlink Reference (which is the Attribute) and the value is the actual link to College in the Clouds. Target equals Blank is another attribute which we will explain in a moment. The word link will be highlighted so viewers know that it is a clickable link. The hyperlink ends with a closing anchor tag. Click Save and open this document with your web browser.
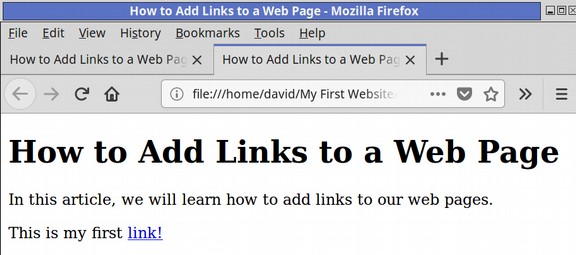
Click on the word link. You will see that a new browser tab opens and the College in the Clouds website is displayed there. But also note that the tab to your source web page is still available in the browser.
Go back to the Bluefish workspace and add a new line. Then type “This is my second link. Select the entire sentence and click on the P icon. Then select the words “second link”. Then click on the Anchor Icon again and copy paste in the College in the Clouds URL but this time leave the target empty. Here is what the HTML for both links will look like:

Then save the document and open it with your browser. Click on the second link and you will see that the link opens in the current tab. There is a back arrow to our original web page – but no browser tab. You are generally better off adding a blank target in order to preserve the tab in order to assist your viewers in getting back to your original web page.
Hidden Versus Visible Links
Note that your links can be attached to a single word or a group of words or even an entire sentence. But in all of these cases, the actual URL will be hidden from your readers. Save your document with both links and open it in a browser. Note that even when you hover your cursor over the link, there is no indication of where the link goes to.
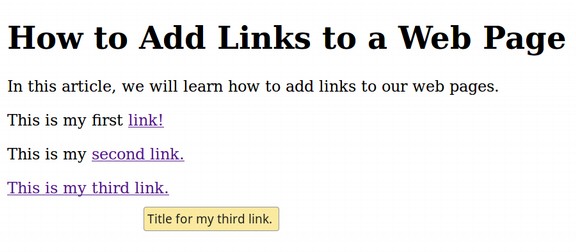
Now create another new line and type in This is my third link. Select the entire sentence and click on the Paragraph icon. Then select the entire sentence again and click on the Anchor icon.
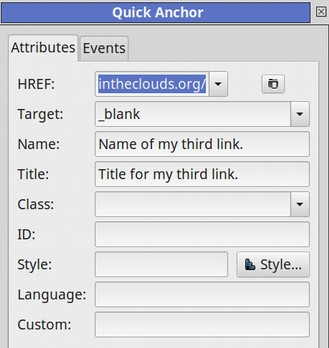
Enter the URL, select Blank and type in for Name, Name of my third link. Also type in for Title. Title of my third link. Then click OK. Save the document and open it in a browser.
The title attribute is at least some kind of clue as to where the link goes to. But what we really want is to evaluate the actual link before we visit a web page. Type in a fourth link and insert the URL into the title as well as the HREF.
Then save the document and open the page with a browser.
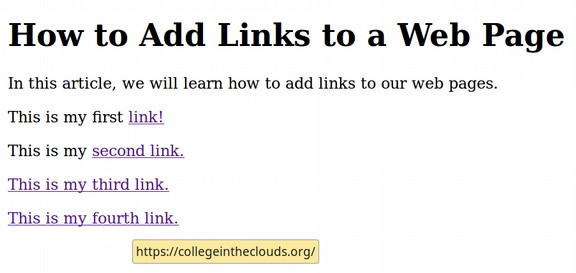
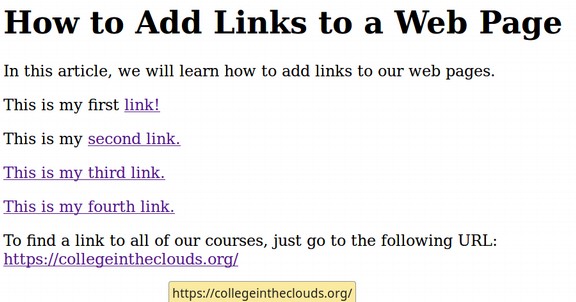
This is better but still requires hovering over the link to determine the actual URL. The best way to achieve transparency is to include the link itself in the content of the sentence so that it is visible even without taking the time to hover over the URL. Enter a new line, then copy paste the following sentence.
To find a link to all of our courses, just go to the following URL: https://collegeintheclouds.org/
Select the entire sentence and click on the paragraph icon. Then select only the URL and click on the Anchor icon. Save and view with your browser:
Why does it even matter if your URLs or hyperlinks are transparent? The reason is that some web pages are more secure than others. For example, a webpage URL that begins with HTTPS is typically more secure than a web page that begins with just HTTP.
Also, if you are linking to an important research report, it will have more wieght in the readers mind if the link goes to the University of Washington website than if it goes to a website called spaceraiders.com.
It is troubling that many courses teach students to hide the destination of links behind meaningless words – as if revealing the destination of the link was somehow bad manners. What is really bad manners is making it hard for your viewers to see where the link is directed to or is coming from. My hope is that someday, using visible links instead of hidden links will become the new norm.
External, Absolute or Full URLs versus Internal, Relative or Partial Links
An external, absolute or full URL proovides the complete link to the web page regardless of the page that the viewer is currently on. An internal, relative or partial URL provides only the end of the URL. The supposed benefit of a relative URL is that the author of the page does not have to type in the beginning part of the URL. For example, instead of typing mywebsite.com/html/myfirstwebpage.html the author simply types the relative location of the page beginning with the folder it is in. For example, html/myfirstwebpage.html. Since we can copy and paste the domain name in the beginning of the URL, it is doubtful that relative URLs save that much time.
However, there are two major drawbacks to using relative URLs in that the actual link to be used is relative to the page that the link appears on. If one is adding a relative link to another page within the root folder of the website and is placing this link on the home page of the website, then the relative URL will be .../foldername/filename.html. However, if one is placing the link on a page that is not in the root folder of the website but in a sub folder, then the relative URL will be different – as we will explain in a moment.
The second drawback of using relative URLs is if we want to convert a web page into an HTML newsletter, which we will do in a later chapter, then all of the relative URLs will need to be converted into absolute URLs because many email readers are very primitive and will not recognize a relative URL.
Some courses and books mistakenly teach students that absolute or full URLs are only used for links to external web pages or pages outside of the root folder of the website. They then get into long winded explanations of how to use internal partial URLs to link to pages inside of the website. This advice is not actually true. It is possible and even common to use absolute or full URLs for pages inside of your website. Better advice would be for beginners to always use absolute or full URLs instead of relative URLs. Therefore, we will just briefly describe how to create a relative URL while using our Bluefish web editor.
How to Create a Relative URL
First, we need to make a few changes to the folder names in our website root folder. Folder names can include capital letters and spaces as long as they are not being used as links. However, any folders that have HTML documents being used as links should have names with only lower case letters (and numbers) with no spaces between the letters. For example, instead of calling a folder HTML Files, we should call it html_files. The words can use an underscore between them to make the folder name easier to read or simply be mushed together as htmlfiles. The same rules apply to the file names inside of our folders.
Second, we need to create a home page for our website. Traditionally, the home page is called index.html and it must be located in the root folder of our website – not in a sub folder. Open Bluefish and create a web page. Give it a title like My Home Page. For the heading, type in “Welcome to my home page!”. For the paragraph, type in “Here are links to some of the other pages on my website.” Then, instead of saving it in the html_files folder, place it in the root folder of your websiteand name it index.html.
Here is the HTML for our home page:

Open this document with your web browser and copy the URL. Here is the local URL for my home page (your URL may be different depending on the folder structure of your computer’s file manager):
file:///home/david/My%20First%20Website/index.html
Now use your Bluefish editor to open some other html page that is in your html_files folder. We will open our myfirsthtmltable.html file. Then open this with your web browser and copy the URL.
file:///home/david/My%20First%20Website/html_files/myfirsthtmltable.html
This is the absolute URL to this web page. Note that this file has the same absolute URL has our Home page except that the ending /index.html has been replaced by /html_files/myfirsthtmltable.html.
Thus the absolute url to any file on the website is simply:
websiterootname followed by a forward slash then the folder and file path.
For a normal website on the internet, this would be:
https://mydomainname.com/foldername/filename.html
In our Bluefish editor, click on the index.html file in the bottom panel to return to this web page. Enter a new line and type “This is an absolute link to a table I made.” Then select the sentence and put a paragraph tag around this sentence. Then select the sentence again and click on the Anchor icon to bring up the Quick Anchor window. Copy the full or absolute URL for the table into the HREF and Title boxes. Here is what the Quick Anchor window will look like:
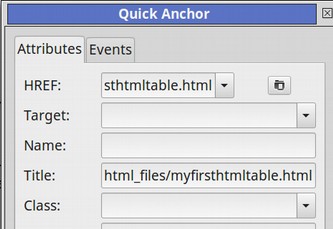
Next, enter a new line and type this sentence: “This is a relative link to a table I made.” Select the sentence and put a paragraph tag around it. Then select the sentence again and click on the Anchor icon to bring up the Quick Anchor window. This time, click on the File icon to the right of the HREF box. This will bring up your File Manager. Navigate to the HTML file you want to insert and then select it. Your Quick Anchor window will then look like this:

Click OK and view the result. Using the File Manager Icon will create a relative link. Note that the link occurs BEFORE the text for the link. Here is the HTML for both the absolute and relative links:

Note that the relative link is simply the folder name then a forward slash and then the file name. Now save your index.html file and then open it in a browser. Here is what your new Home page will look like:
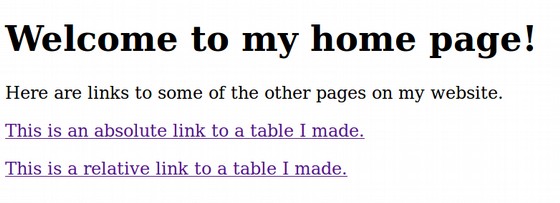
Click on the absolute link to open the table page. Then use the back arrow and click on the relative link which will open the same table page.
Three Ways to Create a Relative Link
Now go back to your Bluefish editor and let’s take a closer look at the attribute for the relative link that Bluefish created.
href="html_files/myfirsthtmltable.html"
This relative link only works when it is placed on the Home html file which in turn must be inside the top level of the root folder for your website. If the link is placed on any other page that is in one of the sub-folders of the website, then the Bluefish editor will insert the following relative link instead:
href="../html_files/myfirsthtmltable.html"
Note the addition of two dots and a forward slash at the beginning of of the relative link. These two dots and the forward slash tell the web browser to go back to the root folder and then look for the sub folder and then look for the file inside of the sub folder. We will take a closer look at this second link method in the next section.
There is a third way to specify a relative file. If you are linking from one html file to another html file and both files are in the same sub folder, you use either the full link option or the two dot option. But you can also simply use the file name as the source – without the need for specifying the folder path. To see how this works, open the myfirstweblists.html file – which is in the html_files sub folder.
Scroll down to the bottom of the document and enter a new line just above the closing tag. Type: “Here is a link to my Table Page – which is in the same sub-folder as this List page.” Then select it and click on the Paragraph icon.
Then select it again and click on the Quick Anchor icon. Then click on the Folder icon to the right of the HREF box. The file manager will open in the same folder as the List file is located. So you merely need to click on the myfirsthtmltable.html file and open it. Set the target for blank and give the link a title. Here is what our Quick Anchor window looks like:
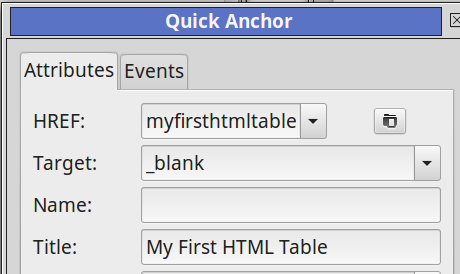
Click OK. Here is what the HTML inserted by Bluefish for this link looks like:

Note that there are no two dots or a sub folder in the HREF. Merely the file name. Now save the list file and open it in a browser. Click on the link at the bottom of the page and hopefully your table page will open in a new window. There are even more ways to make relative links. Whenever you want a relative link, use the Bluefish Quick Anchor Icon and click on the File Manager icon. Bluefish will enter the relative HTML code for whatever path is needed. But the problem with this level of complexity is that mistakes occur which leads to broken links. This is yet another reason I recommend sticking with absolute URLs whenever possible.
What’s Next?
Now that we have a better understanding of how to make absolute and relative links, in the next article, we will look at attributes for a special kind of link – the image link.